Our social:

Latest Post

Showing posts with label Chettinad special. Show all posts

Tuesday, December 4, 2012

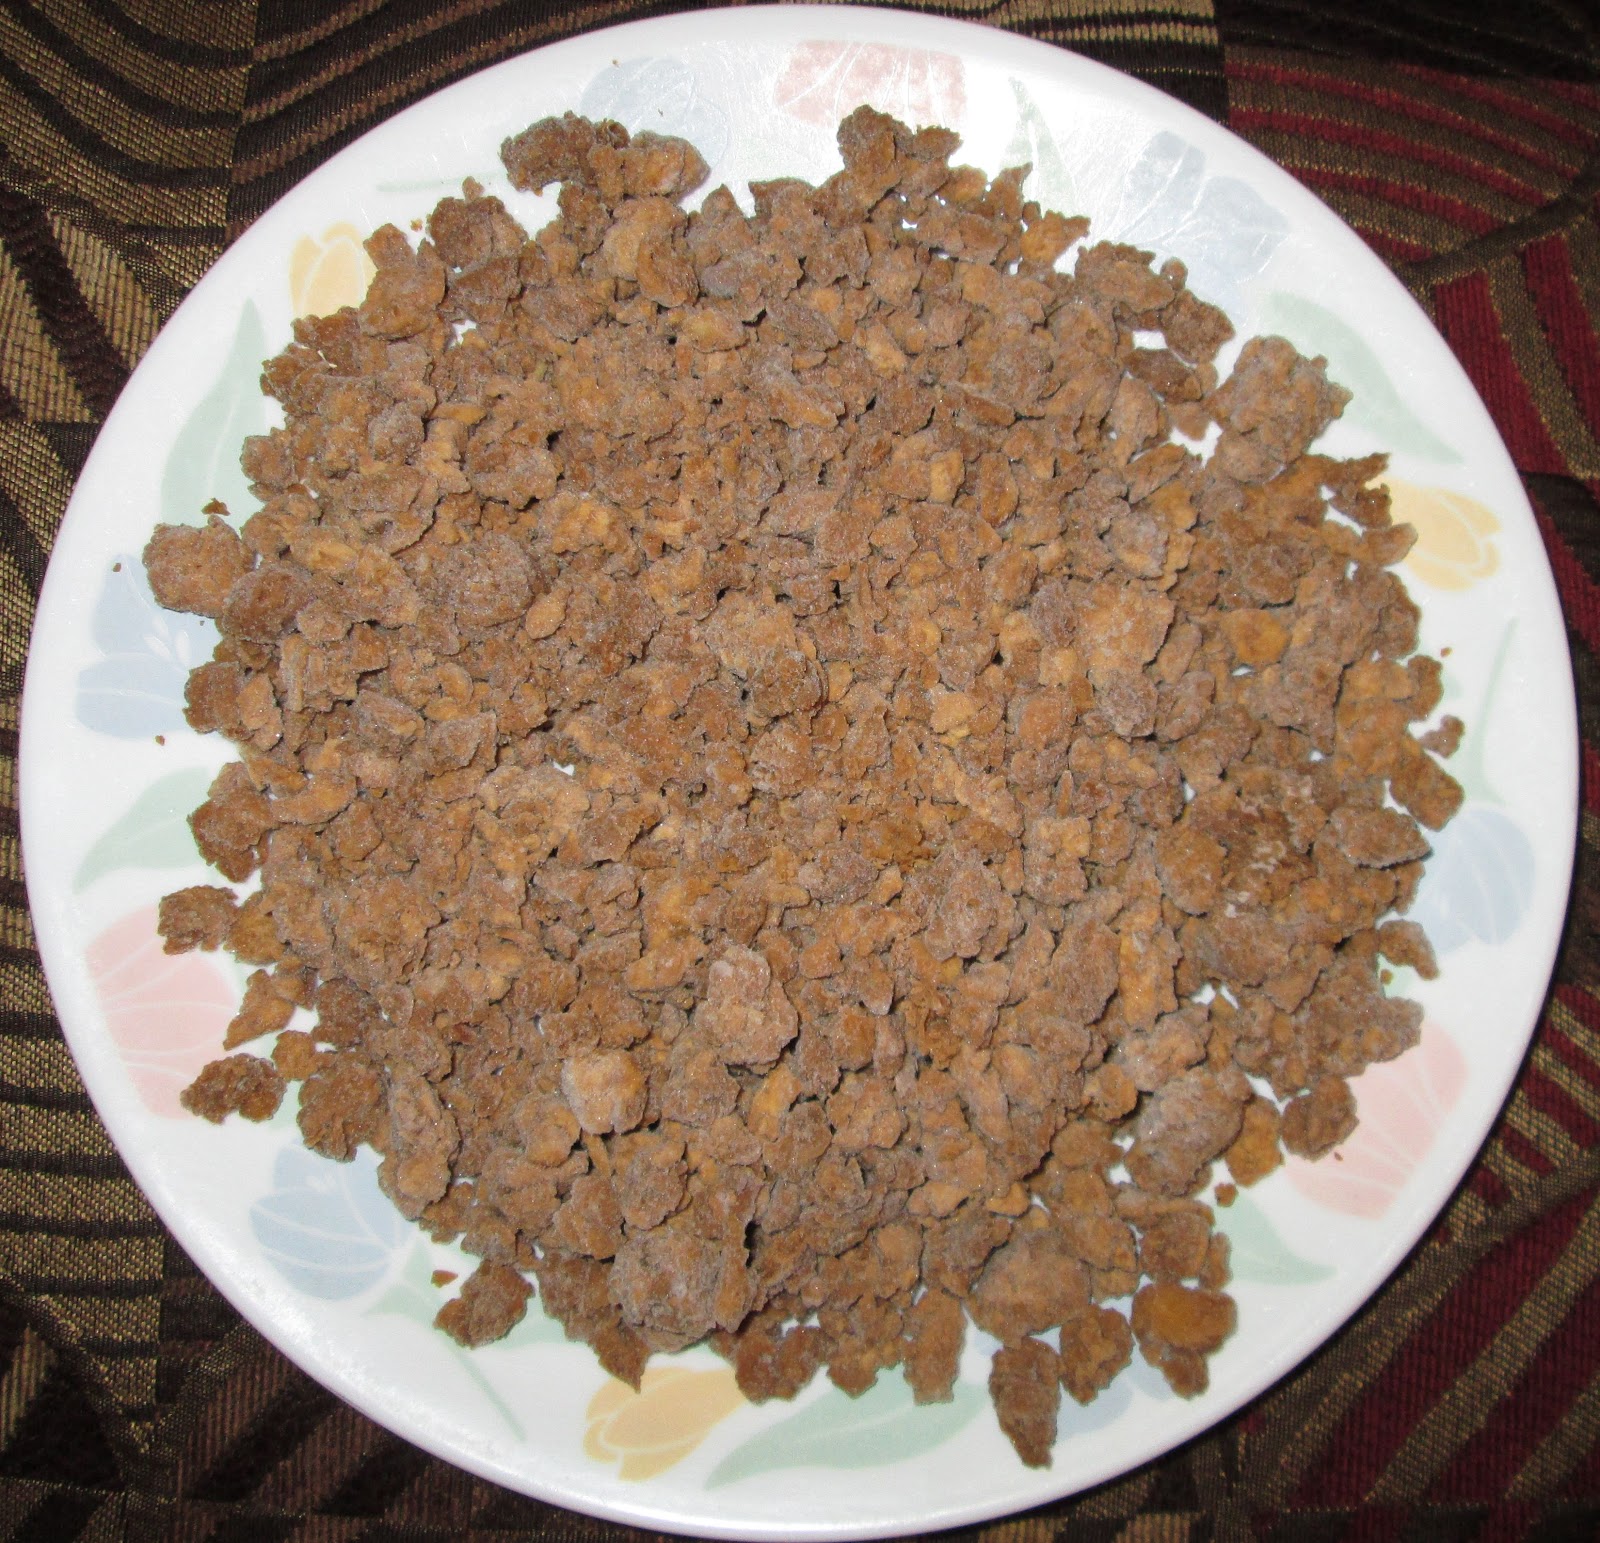
Podimas with Soy Chunks (Vegetarian version of Mutton Podimas )


                                                I am back from US with a new recipe which I found very interesting for non-veg lovers who is restricted from taking mutton for some reason.  I happened to taste this podimas in one of our friend’s house in US. Since it was the month of Karthigai we don’t eat non veg and the host wanted to cook something interesting similar to non veg. In spite of their busy schedule our people in foreign countries want to cook delicious food. I will need a separate post to write about their interest in cooking and the way they carry our culture there. The curry she served was very similar to the mutton podimas we cook. I asked what it was and she gave me all details and even gave me the packet cover of the soy chunks she used. Many in US will be aware of this and will be cooking different recipes out of this. For the new comers I wanted to blog the recipe. This packet is available in almost all grocery stores in US like Giants,Walmart etc. Bachelors can cook this with not much of ingredients and have a great side dish for chappathi or idli or dosa if made little watery.

                                               This soy chunks used is precooked I guess with salt,garlic and chili.I tasted it before cooking and found all tastes in small quantities.So we should be careful while adding salt and hot taste while cooking.It is soy chunks cooked and crushed.
Ingredients
Onion- one (minced)
Green chili-2
Tomato puree -1/2 cup (I used Hunts crushed tomatoes)
Ginger garlic paste- 1 teaspoon
Red chili powder- 1 table spoon (use as per your requirement)
Garam masala powder-1/2 teaspoon (optional)
Kadalai paruppu (channa dhal) -3 table spoons (¾ cooked) cook it for 10 minutes in a kadai or pressure cook for one sound or 6 minutes
For seasoning
Cinnamon-2 small pieces
Clove-2
Bay leaf-small piece
Fennel seeds-1 teaspoon (many wont like this taste but this should be added to all non veg since it helps in digestion)
Curry leaf-little
Procedure
                     Keep the frozen packet out for 3 to 4 hours till it comes to room temperature.Those who go for work  can keep it  in the regular fridge in the morning if they cook in the evening or at night if cooked in the morning.
                            Keep the kadai in the stove.In one table spoon of oil season the curry with items given  in ‘for seasoning’.Now  add the minced onion and green chili and sauté well . Add ginger garlic paste and mix well .Now add the garam masala powder and chili powder and the salt required. Remember the soy chunks already contains some salt taste. Saute well. Add the soy chunks and mix well and cook for 5 to 6 minutes with the kadai closed in slow fire. Now open the kadai and add the tomato puree and cook with the lid open till all water content disappears and try to roast it in slow fire to the desired consistency. If you want the dry version add the cooked channa dhal and mix well. If you want to use it for chappathi then don’t dry roast it. If it is for chappathi switch off little early that is sometime after adding tomato puree. Those who don’t mind adding an egg can add it to the dry version.It will increase the taste.
                                                     Try this recipe and find out different recipes out of this. I found it  being used along with vegetables in noodles and tasted similar to chicken.
                                                       People living in other countries please wait,I will find a method to cook this with the regular soy balls available
                                                 

Tuesday, April 24, 2012

Thengai Paal Kanji (porridge with coconut milk)


                                                       I am sure this will be an item familiar to all Tamilians. This kanji is an excellent home remedy for ulcer in the mouth,tongue or stomach.The healing effect of coconut and fenugreek does the wonder. All of us one day or the other will  be suffering from the mouth ulcer and find this kanji very useful..For the bachelors who have food outside the whole week can have this on the week end to soothe the stomach. Paruppu thuvayal  or Vendakkai pachadi will be an excellent combination.


Ingredients
Raw rice or Rice that you cook -1/2 cup
Garlic pods-10
Fenugreek seed -1 ½ teaspoon
Coconut milk –milk taken from a small coconut  or ½ cup thick tinned coconut milk

Procedure
Pressure cook the rice along with the garlic pods and fenugreek seeds adding  quarter cup coconut milk and 2 cups water.In slow flame cook the rice for 12 minutes.Open the cooker and smash the rice with a ladle adding little salt.remember this kanji does not need much salt. Now add nearly 2 cups of coconut milk.Add water to the tinned milk to make it two cups if tinned coconut milk is used. Serve immediately as the porridge will become thick once it cools .If you are going to use it later and find it very thick little more coconut milk or warm water can be used.


Friday, December 3, 2010

Kathirikkai Sadam (Brinjal Rice)

There are different ways of doing this item. I too used to do it in a laborious way until I tasted a very tasty and easy recipe in Sathya’s house. Sathya my neighbor who may be known to my readers through my blog on sathya aunty’s rasam is good in cooking and provides me with some interesting recipes.
When we are short of much vegetables or time or interest, then this is an excellent choice. The same recipe can be used for capsicum and some other vegetables also. Try out with some more vegetable available in your area. Kopra or dried coconut is best suited for this recipe. Here in India only in Andhra we get this easily. If kopra is not available grated coconut can be used and sauted well.

Ingredients
Cooked rice-2 cups (don’t over cook .cook like you cook for tamarind or lemon rice)
Brinjal -1/4 kg
Tomato-1
Onion-1
Curry leaf –little
Coriander leaf –little
Ingredients for the masal powder
Red chilies -10
Coconut-2 table spoons or kopra
Urudh dhal-2 table spoons
Channa dhal ( kadalai paruppu)-2 table spoons
Dhania (coriander seeds)-1 teaspoon
Cinnamon-a small piece
Clove-2
Fenugreek ( vendayam )-1/2 teaspoon
Procedure to make the powder
In little ghee or oil first roast the chilies and keep apart. Then sauté everything adding one by one in the order in which it is given. No need to fry it till red. Switch off when you feel it is roasted. In a mixie powder it and store it.
Procedure
Keep the kadai in the stove. In a table spoon of oil and ghee mixed, season with a small piece of cinnamon, clove and curry leaf. Add the minced tomato and onion and sauté. Add the brinjal pieces too and sauté in low fire adding salt and turmeric powder. Make sure that brinjal pieces don’t get over cooked. Stay near the stove and sauté. If necessary sprinkle some water. If you close the kadai for a minute, it will get cooked fast. Once you feel that the brinjal pieces are cooked, add the masal powder and mix well. Mean time transfer the rice to a flat bowl. Add little ghee or oil and little salt to the rice and allow it to cool. Once you feel the rice is not very hot add the rice into the kadai or the brinjal into the vessel and mix well in such a way that the rice or brinjal pieces do not get smashed. Garnish with coriander leaves. Heat the rice in a microwave or kadai while serving
You can prepare this powder in lots during weekends and can store .Then making this rice will only be a few minutes job.
+

Thursday, October 28, 2010

Thenkuzhal Mavu Or Murukku Mavu

Deepavali is fast approaching and the thought of what to make at home for deepavali will be running in everybody’s mind now. Whatever snack we buy outside can’t compromise the home made thenkuzhal or murukku. Chettinad snacks are very famous especially thenkuzhal, Kai murukku, Cheeppu cheedai, Mavurundai, Managolam etc.
There is difference between thenkuzhal and Kai murukku and their mavu, but for the readers sake I have mentioned as thenkuzhal or murukku as same since many know thenkuzhal as murukku only. Now days we never make Kai murukku at home and no need to bother about that. The specialty of chettinad thenkuzhal is that it won’t turn red but at the same time will be very crispy. Many are doubtful of the exact proportions and I hope the blog will be useful for those who can manage to find a mill to grind the mavu.

Ingredients
Rice -7 uzhakku or 7 cups
Broken urudh dhal -2 cups (whole urudh dhal won’t get roasted fast)

Procedure
Procedure is more important than proportions. No need to wash the rice and dry it under the sun.
Take 2 soft towels. I use eerizhai thundu or Co-optex towel. Wet the towel nicely and squeeze out the water. Take handful rice and clean it nicely with the towel and put it in a paper under the fan. Likewise clean the entire rice. Use different parts of the towel for each handful. Allow the rice to dry nicely. It will dry fast as you have not washed the rice.
The next important thing is how to roast the urudh dhal
Put the frying pan in the stove. Keep the stove in low fire. Add a handful or two of urudh dhal and roast in low fire for 5 minutes. The urudh dhal should be roasted in such a way that it should never get red at the same time be well roasted. Likewise roast the whole urudh dhal. The two cups has to be divided into 5 portions for roasting. Allow the urudh dhal to cool and mix it with the rice and take it to the mill for grinding.
While going to the mill take with you 2 cups of rice also. The thenkuzhal mavu in the mill should be grinded only after grinding rice flour or somebody else’s murukku mavu. So if you don’t see the person in the line not grinding either of these you grind the rice which you have brought. If the Thenkuzhal mavu is grinded after grinding wheat flour or ragi, it will spoil the murukku you are making.
Once the mavu is ready, things are simple .Just add enough water and salt and mix the flour. Put it in the kuzhal or press and make murukku. In chettinad we don’t add anything else to the mavu. If desired little chili powder can be added for kara murukku. No need omam or jeeragam. Those things will make the murukku burst or crack in the oil and cause danger. Enjoy the crispy murukku with family

Wednesday, September 1, 2010

Vazhakkai kola urundai (vegetarian version of kheema balls with plantain)


I am back to my sweet home after a 5 month stay in US. Definitely missing my grandson 24/7. I need 3 or 4 separate blogs to share my experiences abroad.I was really astonished to see the interest of our guys there in cooking.
After coming home I attended few weddings and collected some rare recipes from the famous chettinad cooks being engaged for the wedding.I will slowly share them with my readers.
The first in the list is the vazhakkai kola urundai,this is a real substitute of the mutton kheema balls for the vegetarians.Those who drool over the kheema balls can have an alternate vegetarian item.
Ingredients
Vazhakkai (medium size) -1
small onion-5
garlic-5
kas kas-1 teaspoon
fennel seeds-1 teaspoon
pottukadalai -3 tablespoons ( should be increased according to the size of the vazhakkai)
cashews -8
green chilli-2
red chilli-2
grated cocunut-2 tablespoons
ginger- 1 inch piece
clove-2
cinamon-a small piece


Procedure
cut the vazhakkai into round pieces as shown and cook well. once it cools remove the skin and smash the pieces nicely using hand.
Keep the kadai in the stove. Pour 1 teaspoon oil.Add cinamon and clove first. Then add onion,garlic,chilli,red chilli,ginger and saute. Now add pottukadalai,kas kas and cashews and roast them in low fire. Once pottukadalai and cashews become pink add the grated cocunut and saute till that too become little red.allow everything to cool. Then grind them to a smooth paste in the mixi. Dont add too much water. If by any chance it turns watery add a hand full of pottukadai and grind. Transfer the grinded items into a bowl. Add the smashed vazhakkai and the salt needed and mix well. Check for the taste. If salt or hotness is missing add chilli powder or salt.
Now the dough is ready for frying. Keep a small kadai in the stove. Add the oil required for frying. Make the dough into small balls and fry in medium fire till they turn golden brown. Dont touch the balls till they get cooked . once they seem to be cooked you can turn sides else there is a chance of balls getting broken.
Your veg version of kheema balls are ready. Serve hot along with tomato sauce and get all the name and fame from your loved ones

Wednesday, March 25, 2009

True Achi's Kuzhambu Milagai Thool

I always think that much of the taste of chettinad dishes is mainly due to the all in one kuzhambu milagai thool that is used there.At this point I want to bring to your notice that in chettinad cooking they use just this milagai thool for all dishes even for the non-veg.But now-a days as a slight modification we have started using coriander powder and chili powder.When I got married my parents were in Kerala and myself in Tamilnadu.Sometimes I used to run out of stock of the all in one kuzhambu milagai thool.at that time I still remember My mom telling me the measurement easily which I still follow.She used to tell me take 2 qty milagai in a container which can hold 4 cups of rice if you don't have a padi .For that add 1 qty Coriander seeds.1/3 qty pepper,cumin,fennel seeds 1 hand full thoor dhal and fenu greek.For the sake of the new ones to the kitchen I clearly give the measurements here
Coriander seeds-1 kg (3 padi)
Red chillies-1/2 kg(6 padi)
Small jeera(cumin seeds)-200gms (1 tumbler)
Fennel seeds - 200gms (1 tumbler)
Pepper corns(milagu)- 200gms (1 tumbler)
Fenugreek seeds-1/4 tumbler(50 gms)
Thoor dhal-100 gms(1/2 cup) non-vegetarians can avoid this
Usually turmeric powder and raw rice 1/2 cup each is added but I don't use it as I find the powder getting spoiled fast
Dry all the items in bright sun for a day or two and get it grounded to a smooth powder from a grinding mill
Those who don't have a grinding mill near by can take a very small cup and use the above measurement ratio and try grinding in a mixie.Those who cant dry it in the sun can keep in the microwave for a minute.
Many of my readers wanted this recipe since a long time and sorry for the delay

Wednesday, September 17, 2008

Saiva Eeral Poriyal (Vegetarian liver fry)


This is yet another recipe found out by the famous chettinad cooks. This curry, I swear will exactly look like the original liver fry. Unlike the vegetarian fish curry, this is not very difficult to prepare also. I am afraid the chettinad cooks are going to file a case against me for bringing their cooking secrets out. However I love to share the little secrets I found out with my readers. The whole green gram dhal is used to make the liver pieces. For big functions the powder is got grinded from the flour mill. But small quantities can be grinded in the mixie at home
Green gram (pachai pasi payaru) -1 cup


Ingredients for the masal
Onion (small)-20
Tomato-2
Chili powder-2teaspoons
Turmeric powder-1/2 teaspoon


Green gram powdered and grinded with a teaspoon of fennel seed and a teaspoon of salt in the consistency of idly batter-1 cup


Coconut paste
Coconut-3 table spoons
Cashewnut-7
Fennel seeds-1 teaspoon
Ginger-1 small piece
Garlic-4 pods
Procedure
Mince the onion and tomatoes. Grind the coconut paste. Keep the idly pan in the stove and make idlies with the grinded green gram dough. Once the idlies are cold cut them in the shape of small liver pieces using a knife. Keep the kadai in the stove. In two tablespoons of oil season the fry with a small piece of cinnamon, 2 cardamoms and a teaspoon of fennel seed. Add the onion and tomato pieces and sauté nicely. Add the coconut paste along with the chili powder and little salt mixed in ¼ cup of water. Once the mixture turns little thick add the liver pieces and cook for few minutes and switch off the stove.

Friday, July 11, 2008

Vellai Poondu Oorukai (Garlic Pickle)

The word pickle itself will tickle the taste buds of many. All in our home too are very big fans of pickle especially the garlic pickle. But now days have started totally avoiding it due to health reasons. Today My Chithi has come home and I wanted to make this pickle and write a blog on this since she is very good in preparing pickles . Moreover I have two lemon trees in my garden and have reaped nearly 500 to 600 lemons this season and I am going on making juice and storing it for the whole year. I thought that I will make use some lemons for the pickle too.


Ingredients
Garlic-! /2 kg (peeled and cut into two halves lengthwise)
Gingili oil-150 ml
Lemon juice-1 ½ cups (300 ml)
Ingredients for the pickle powder
Coriander seeds-50 Gms (1/2 cup)
Fenugreek seeds-1 table spoon
Chili powder-3 table spoons
Jaggery-1 table spoon
Procedure
Dry roast coriander seeds and fenugreek seeds and grind it to a smooth powder. Put the kadai in the stove. In the oil mentioned season the pickle with 2 teaspoons of mustard seeds. When mustard seed cracks add the cut garlic pieces and sauté nicely for 5 to 6 minutes till the garlic gets softened. Now add the lemon juice and allow it to cook in slow fire for 5 minutes. Now add the coriander powder, chilli powder, fenugreek powder and the salt required. Let this powder also get cooked till the oil ooze out (5 minutes).Now add the jaggery and switch off the stove after 2 minutes. Allow it to cool and transfer the contents to a clean bottle.

Tuesday, May 20, 2008

Beetroot Vadai

Yet another item famous in chettinad, a sure choice for lunch when kids are at home. This if left over can be given as an evening snack as well. This vadai will go very well with Rasam ,sambar as well as curd rice. Only thing is that you should make sure that you add enough chilies to hide the sweet taste of beetroot. It is not a must that the vadai should be hot while eating. If you want it as a snack then you have to make it crispier and serve hot.


Ingredients
Beet root -2 small ones (grated)
Channa dhal-1/2 cup
Thoor dhal-1/2 cup
Fennel seeds-1 teaspoon
Red chillies-5
Turmeric powder-a pinch
Asafetida-a pinch
Curry leaves, coriander leaves-little
Grated coconut-2 tablespoons
Chopped onion-1/2 cup
Procedure
Soak the dhal, chilies and fennel seeds for 10 to 15 minutes. Drain the water. Using the small jar of the mixie grind the dhal in such a way that it is neither too smooth nor too watery. For that don’t fill the mixie to the full. It should be only half filled. First grind the chilies nicely then add the dhal. Don’t worry if there if one or two dhal are left without grinding. After grinding the entire dhal mix the grated beetroot, onion, coconut, salt needed, turmeric powder, asafetida and curry leaves with that. Keep 4 tablespoons of oil in a frying pan and heat nicely. When the oil becomes hot sim the stove, make small vada’s out of the mix and put into the oil one by one. After 2 minutes turn the stove to medium flame and go on turning the vada’s both sides and cook till there is not much sound in the oil. You should always be careful about the oil heat. If it is too low, the vada will drink oil. If very hot the vada will get burnt and not cooked. So the flame should always be medium.

Wednesday, October 10, 2007

Chettinad Vellai paniyaram


No chettinad recipe pages will be complete without a note for its traditional delicacy”Vellai paniyaram”.Even if one doesn’t find time to make it themselves, should at least taste it in the traditional chettinad restaurants mushrooming in almost all big cities and towns.Vellai paniyaram will have its place in all the chettiar functions big or small. Though the ingredients will show it very simple, much depends on the way it is prepared. Much care should be taken while preparing. When I was new to the kitchen doing this was a nightmare for me. Now with experience, I have mastered all the tricks of making a perfect Paniyaram. With the help of modern networking technology, I am happy that I can share the tricks with the newcomers in correcting the small mistakes which will come in the beginning. Care should be taken right from the selection of rice. I remember during weddings, a month before itself the old people at home will be buying small quantity of different rice and checking which rice comes good in making paniyarams .But now we don’t find time and energy to do all those things., so I am discovering techniques to correct it even if the rice is not the most appropriate one. In this blog, I will give a note about it. Going through all my stories of the difficulties, don’t be afraid of making an attempt , since the taste of the paniyaram is worth all the trouble in the world. Sometimes you may be lucky enough to get it perfect in the first trial itself.

Ingredients
Raw rice-1 cup (usually small fat rice little cheaper one is good)
Urudh dhal -1/4 cup(usually in chettinad we will take rice to the rim level of uzhakku or measuring cup and then fill urudh dhal to the heap level of the uzhakku(.I have found urudh dhal to be little less than ¼ cup in that case)
Soak both together for 1 hour and grind it to a very smooth paste. Add the required amount of salt while grinding itself.
Consistency of the batter can be little more watery than dosa batter. To make it watery use little milk
Keep a medium size little bit flat tawa in the stove .Pour 1 ½ cups of oil. Keep the flame in medium. Make sure that at no stage the oil gets overheated. When the oil is hot using a medium sized spoon(little bigger than a table spoon) pour one spoon batter into the oil, the paniyaram will immediately rise now with the help of the laddle used to take the paniyaram out, pour the heated oil in the tawa on the top of the paniyaram.This will help the paniyaram to get a flowery border. Within a minute turn it upside down allow it to cook for 1 more minute and remove it from oil.

Allow the paniyaram to cool and now break the paniyaram and see that it is cooked inside also.
If not cook the next one little more.But the paniyaram should never be roasted.

Sometimes the paniyaram will rise like a ball, and then the problem will be either the oil is too hot or your batter is too thick. If you feel it is too thick pour little milk to make it watery.

Sometimes u may feel that the paniyaram drinks oil then the mistake is that u have added too much urudh dhal or your urud dhal is very good in quality. In that case you can add little idly batter, or rice flour.
If you still find any difficulty feel free to leave a comment
Vellai paniyaram will be very tasty with thakkali thuvayal or milagai chutney.
I will come to that section of cookery from my next blog

Wednesday, September 12, 2007

KANDARAPPAM


This is a traditional Chettinad snack item which will have its place on almost all important festival or pooja days. Being little bit sweet, it will be a real treat for sweet lovers

Ingredients
Raw rice-1 cup
Par boiled rice (idly rice)-1 cup
Urudh dhal- 1/4 cup
Peeled broken green dhal-1 table spoon
Thoor dhal-1 table spoon
Bengal gram-1 table spoon
Jaggery -1 ½ cup
Grated coconut-(1/2 cocunut)
Elachi (yelakkai) -6


Procedure

Soak the rice and dhal for 1 hour. Put it in the grinder and grind for 10 minutes. Now add the grated coconut and grind to a smooth paste. Finally add the jaggery and the powdered elachi and grind till the jaggery nicely mixes.

The batter should be in the consistency of dosa batter. Keep the kadai in the stove .Pour the required amount of oil. Once the oil gets heated, keep the flame in sim and using a small spatula, slowly pour 1 spatulla of batter into the oil and wait for a second when the appam raises slowly pour the heated oil on top of the appam 2 or 3 times with the help of a spoon. This will enable the appam to be cooked fast and also to get a curled border (we usually call it as ‘karai katturathu’ in Tamil).Then turn the side, wait for a minute and remove from the kadai.It will not take much time to cook. So don’t wait till it turn brown.

Monday, August 27, 2007

Masalacheeyam


In Chettinad menu, Masalacheeyam will take the place of ulundu vadai in the evening tiffin or dinner.A very tasty and safe item, since it will not cause any problem even if the dough is little loose. In my early cooking days whenever I have to make vadai, I will attempt only this. We can change the dough to the required consistency without doing any damage to the taste. So this will be a blessing in disguise for those who find it difficult to grind the vada dough to the correct consistency or make them in correct shape. Moreover it will neither become very oily nor very tough unless the dough is very watery.


Ingredients
Raw rice -1 cup
Par boiled rice-1 Table spoon
Urudh dhal -1 cup
Javvarisi-1 table spoon(pearl sago in English or sabudana in Telugu)

Soak all these for 1 hour and grind it to a smooth paste adding water little by little to the dough. The dough should neither be too thick like the vada dough nor become very watery. The consistency can be somewhat like the urudh batter we make for idly. Add the salt required also while grinding itself

Ingredients to be added in the dough


Small onions finely chopped-1/2 cup
Green chilies chopped-3 to 4
Grated coconut-2 tablespoons
Curry leaf chopped-1 tablespoon
Mustard seed-1 teaspoon
Urudh dhal-1 teaspoon

Keep the kadai in the stove. Pour 1 tablespoon oil. When the oil gets heated, add the mustard seed, urudh dhal and curry leaf. When the mustard cracks add the onion and chillies stir for 2 to 3 minutes, then add the grated coconut stir for 1 more minute. Add the entire thing into the dough and mix well. Now keep the kadai in the stove.Pour the oil required for frying the cheeyams ( 2 cups).when the oil gets heated make the doughs into round balls simply with your hand and fry it. Don’t bother about exact round shape.It will become round when it falls into the oil. sometimes it will get a tail like what mine has(see in the snap attached) .Keep the flame in medium. When the cheeyums turn golden brown, transfer the cheeyums into a plate spread with tissue paper. When the oil gets absorbed it is ready to be served.

Sunday, August 19, 2007

kozhukattai

This is a very easy and tasty evening snack which my mom will prepare in the evenings. Since it is a steamed item, is safe for calorie conscious people and small children. My mom will call this as Atti Kindi Kozhukattai. very
Ingredients
Par boiled rice (idly rice) - 1 ½ cup
Red chillie-6
Curry leaf
Urudh dhal-1teaspoon
Mustard seed-1 teaspoon
Bengal gram-1 teaspoon
Oil-2 table spoons
Grated coconut-2 tablespoons

Procedure
Soak the rice for 1 hour. Put it in the mixie with the salt needed and grind for 2 minutes.
Add 1 cup of water to the grinded batter.
Keep the kadai in the stove. pour the oil ,when it gets heated add the mustard seed and allow it to crack then add the urudh dhal, curry leaf and Bengal gram .When the dhal gets roasted add the grated cocunut stir for a minute, then pour the batter into the kadai and go on stirring. Switch off the stove when it becomes thick to the consistency that you can make balls out of it. Allow the batter to cool for 2 or 3 minutes. Then make kozhukattai’s of the desired shape .Steam the kozhukattai’s in the idly pot for 5 minutes. This kozhukattai can be eaten without any side dish. But if you can find time then you can prepare Tomato chutney or coconut chutney. It will taste yummy in that combination.

Saturday, August 18, 2007

Kuzhi Paniyaram

This is a famous and tasty tiffin item found in chettiar breakfast. This can be made both salty and sweet. Children love the sweet ones. When I write this I remember my childhood days .We used to go to our huge ancestral house in chettinad for our school holidays. All my cousins also will be there for the holidays. We will be altogether 20 to 25 grandchildren. My grandma will plan to make this paniyaram.The servant will be sitting in the verandah of the kitchen and will be going on making this paniyaram. As it will be like an egg we will take 2 or 3 in our hands and will be going on playing in the court yard eating the sweet ones and the salty ones alternately. Nice old memories.

Ingredients for grinding
Idly rice-1 cup
Raw rice-1 cup
Urud dhal-1/4 cup
Fenugreek seed-1 table spoon

Soak all the four together for 2 to 3 hours and grind nicely .Mix it with very little salt and ferment for 8 hours.


Masala paniyaram

Ingredients
Small onions finely chopped-1/2 cup
Green chilies finely chopped- 3
Curry leaves chopped -1 table spoon
Grated coconut- 2 table spoons
Mustard seed-1/2 teaspoon
Urudh dhal-1/2 teaspoon

Procedure
Keep the kadai in the stove. Pour 1 table spoon oil add the mustard seed and curry leaf. Wait till the mustard seed crack. Now add the chopped onions fry for a minute .Then add the green chilies and the grated coconut. Fry for another two minutes. Finally add the fried items and little more salt into the batter and mix well.
If you are not using a non stick kuzhi paniyaram vessel take the vessel and apply some oil
in all the holes and keep for half an hour. After that keep the kadai in the stove in low heat pour ½ teaspoon oil in all the holes. When the oil gets heated pour the batter to the 3/4th level .After 2 minutes close the kadai for a minute. Don’t keep the stove in high flame. Pour few drops of oil on top. When you feel it is cooked underneath turn it upside down with a long needle like thing or with the stick provided. Allow the other side also to cook well.
This kuzhi paniyaram tastes excellent with Thakkali thuvayal which I will come to later.


Sweet paniyaram

Ingredients
Jaggery or palm sugar (karupatti) - 1 cup
Cardamom-1 teaspoon powdered
Keep the powdered jaggery along with ½ a cup of water in the stove. Add the cardamom powder also. Allow it to boil for 5 minutes. The jaggery should melt and boil for 2 to 3 minutes. Add this to the batter and make paniyarams in the same way as masala paniyaram.

Those who can’t find time to grind the batter separately for this, can try out the masala paniyaram using idly batter. It will also be excellent.

Friday, August 3, 2007

Chettinad Food


Chettinad is famous for its rich cultural heritage,art and architecture,huge mansions etc etc.But more recently it is becoming well known world over for its mouth watering culinary delicacies.Chettinad restaurants are being opened in almost all big cities and towns world over Chettinad food is famous for its spicy aroma.Most of the food items are easily digestible,less in caloric value compared to other south indian food items since items like cheese butter and cashews rarely find its way in chettinad recipe.Cocunut which is feared by all for its high cholesterol content is also used in very small quantities.


My favourite hobby is to browse the net for good new recipes.I am a fan of many food bloggers like Aayi's recipes,ruchi,mysamayalulagam and it goes on and on.Myself a chettiar lady known to be a good cook among the people who have tasted my food was always having an idea of sharing my recipe with others.The need for writing down recipes was more felt immediately after my daughter got married and left to US.She was totally new to kitchen,rarely had a glimpse of kitchen as she was always in the hostel busy with her studies and projects.I had to help her out with the recipe of each and everything she cooks.After six months my recipes has made her a good cook.This sowed the seed of the idea of blogging in my mind. So came solaiachis kitchen.Why cant my recipes help many more young girls and boys who have to cook their own food and are away from their homes for so many reasons.I will begin with simple ones like idly and the side dishes for it