Our social:

Latest Post

Showing posts with label Chettinad special(gravy). Show all posts

Wednesday, May 6, 2015

Chettinad Egg Masala (Chettinad Muttai Masala)

 Boiled eggs in any form is tempting for people of all ages. That too egg in a rich gravy,it will be really mouth watering. This Chettinad egg masala is very easy to cook even for bachelors as it does not require any grinding.
                                         Now a days there is a mushrooming of Chettinad restaurants in all levels from five star to road side shops naming themselves as Chettinad. I am really proud that every one is fond of Chettinad food. My only concern is that people have a misconception about Chettinad food that it will be very spicy and will made of hand grinded masala.The truth is that Chettinad food will be very mild and with very little grinded masala.Chettinad achi as I have mentioned several times in my previous blogs that they don't use too much of anything.I have seen my mom,grand mom and the relatives of my elder generation taking 6 to 7 ladies finger,4 small onions,3 pods of Garlic and a very small tomato for a ladies finger sambar. The amount of thoor dhal they use will be one hand full.Another thing that I want to tell here that they use only one kuzhambu milagai thool for almost all  veg and non veg curries. Coconut is very rarely used and when used also very little is used as they believe that too much of coconut will spoil the taste of the gravy.They don't use much oil too.It is the care and patience of their cooking makes the food delicious.
                                                     Last week we went to a famous chettinad restaurant in town and ordered for a Chettinad mushroom gravy.The gravy which was served was really mouth watering with oil on top and full of masala.since we are not used to so much of masala we couldn't finish the dish though we liked it. It was 8 pm that we had our dinner out there. By 12.30 I got up with some pain in the stomach and was lying in the bed thinking of what to do. With in ten minutes my husband also got up complaining of some burning sensation . The next two days was really bad for us.This incident really made me write this blog.Please dont use too much of spices and grinded masala thinking of making the gravy tasty as it is not  good for the stomach.Be very careful while using oil too. Use oil in correct quantity.Too less oil also will make the dish taste less.
                                               Coming to our egg masala it is very simple and easy and does not require too much of ingredients.9 out of 10 times we think of egg curry only when we run out of vegetables or when we want something fast.So this recipe will be handy that time.

Ingredients
Boiled egg. 4
Minced onion. 1
Tomato. 1
Chopped garlic. 4 to 5 pods
Kuzhambu milagai thool (sambar powder). 2 table spoons
Coriander powder 1 table spoon
Turmeric powder. 1/2 teaspoon
Curry leaves. Little
Coriander leaves to garnish


Procedure
Boil the eggs for 20 minutes with eggs immersed in water in a kettle.Let the eggs cool.once they are cold bring it under running water and peel off the shell.Cut the eggs into halves and keep aside.now for the gravy keep the kadai in the stove.In two table spoons of cooking oil season the gravy with a teaspoon of fennel seeds,3 small pieces of Cinnamon,2 cloves and few curry leaves.add the minced onions and a pinch of salt and saute for 2 minutes .Now add the tomatoes minced and saute for 2 minutes.when the tomatoes turn soft add the kuzhambu milagai thool,turmeric powder and coriander powder,salt required and mix in low fire.high flame will burn the powders,so be careful.once they are mixed add a cup of water and cook in medium flame for 10 minutes.when you feel that the gravy is in the desired consistency add the boiled eggs and cook for 3 more minutes. Make sure that there is enough gravy for the eggs to be inside the gravy.If you want gravy to be more ,double the onion and tomatoes and the masala powders. Before adding the eggs taste for salt and spice if found less add them. Finally garnish with coriander leaves.
                   This  recipe will take only 30 minutes to cook as we can make the masala while we are boiling the eggs.


Monday, May 14, 2012

Instant Rasam (Quick Tomato Rasam)


                                     I have already blogged 2 recipes of rasam. Now a days I stick to this recipe because its a very easy, fast and tasty preparation. Bachelors who come home tired and want to have something hot and tasty very fast can have this along with chips. Even my younger one is able to prepare this in no time with almost good taste. I want my readers to try it once and get back with comments.
Ingredients
Tomato -1 (if you use a bigger one reduce the tamarind used)
Red chili-2 (1 for grinding and one for seasoning) I have shown 4 but use just 2
Garlic-7 pods
Pepper corns-1 ½ teaspoons
Small jeera-1 ½ teaspoons
Tamarind-little
Turmeric powder-1/2 teaspoon
Curry leaves &coriander leaves-little
Jaggerry –a small piece (totally optional) Try with and without and find out your taste
Procedure
In the medium jar of the mixie grind the tomato, pepper corn,jeera,garlic,1 red chili and turmeric powder. Run the mixie for a minute. In 3 cups of water add the salt required along with the tamarind and keep ready.
Keep the kadai in the stove. In a teaspoon or two of cooking oil season the rasam with a teaspoon of mustard seed ,small jeera and little curry leaves. Pour the grinded mix into the kadai. Keep the stove in medium and sauté till you get a nice flavor. Now add the tamarind salt water and bring rasam to a nice boil (boil for atleast 3 minutes).  Jaggerry if used can be added now and cook for a minute.Check for the salt and hot taste. If found anything less, little pepper  jeera powder or salt can be added. Switch off and garnish with coriander leaves if you have 

Friday, May 11, 2012

Chettinad Milagu Kozhi Kuzhambu (Chettinad Pepper Chicken Gravy)


                                                 Chettinad is famous for spicy non-veg items. These pepper gravies of chicken or lamb are specially made during the mass prayer to the ancestors which we call padappu.To serve the big crowd the gravy will be little watery but the taste can’t match the carefully made gravy made at home. In the padappu they use only pepper for hot taste. But for the small quantity we make at home, I feel that little chili powder should be added .I recommend the use of a glass of coconut milk also since the chicken and pepper are hot and especially during summer coconut milk will compensate little bit of heat. This preparation which I have blogged is one of our favorite item in a mess in our town. I personally met the old woman who cooks this in the mess, a member of the family who runs the mess and got the recipe. My elder daughter also loves this gravy and wanted me to blog it today itself so that she can serve it in my grandson Siddarth’s Birthday party tomorrow. He is turning two today.
Ingredients
Chicken -3/4 kg
Big onion chopped -2 cups
Tomato-2
Garlic-10 pods
Ginger garlic paste-1 table spoon
Curry leaves-little
Red chili powder-1 table spoon
Pepper fennel powder- 2 table spoons (keep some powder extra so as to add according to taste)
Coriander powder – 1 table spoon
Coconut milk thick- 1 cup

To season
Cinamon-3 small pieces
Bay leaf-1 small one
Clove-3
Pepper fennel powder
Take 4 table spoons of pepper and two table spoons of fennel seed (perungeerakam).Powder it well and store in a container. Use the required amount.
Procedure
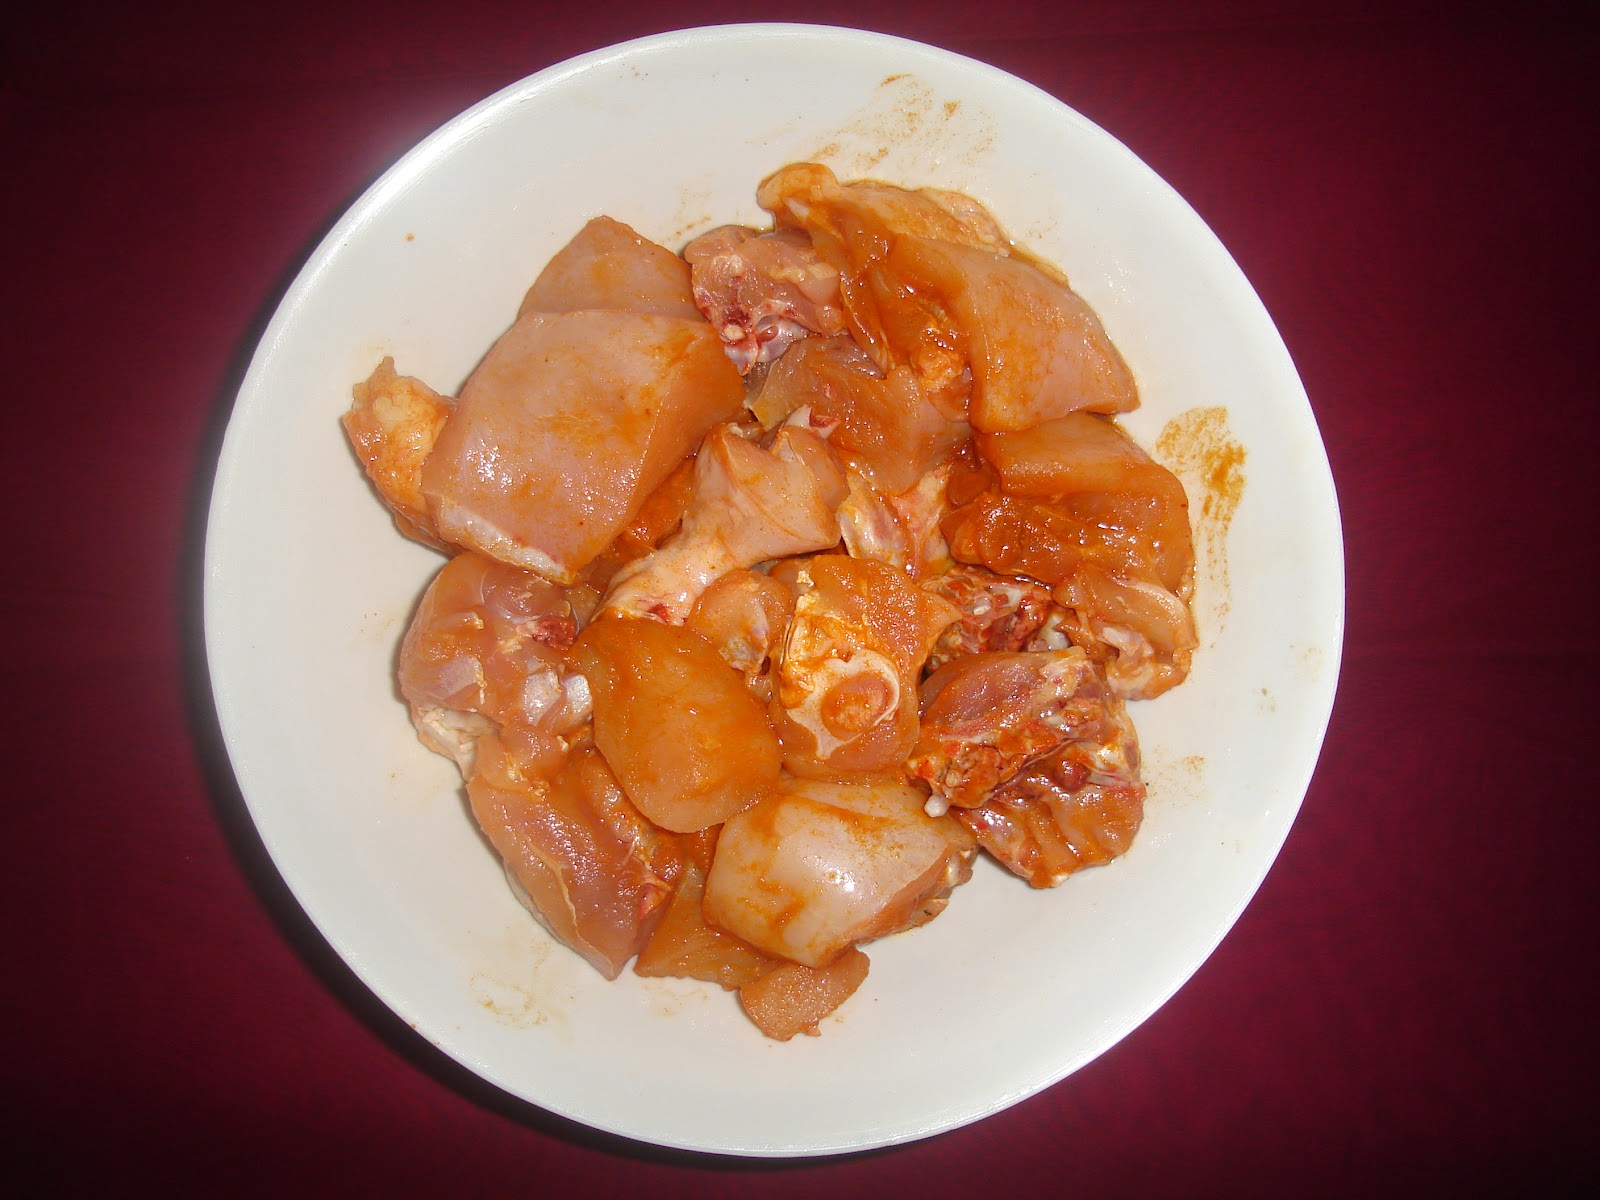
Marinate the chicken pieces with the 1 table spoon chili powder and little salt and marinate for an hour.
Keep the kadai in the stove. In three to four table spoons of oil season the gravy with the items given in ’to season’. Add the garlic pods first. When it turns golden brown, add the ginger garlic paste, chopped onion and sauté well. Then add the tomatoes.Saute well till the tomato pieces are soft. Now add chicken pieces.Saute well till water oozes out from the chicken.Then add the coriander powder and half of the pepper fennel powder and sauté well.Close the kadai checking in between that there is water in the gravy. If there is no water to cook, mix 1 cup of water to ½ cup coconut milk and add. Cook for 15 minutes in low fire .This cooking time absolutely depends on the quality of chicken you use. In  US I have found the chicken getting cooked very fast.But here in India it takes pretty long time to cook in an open kadai. When you feel the chicken is almost cooked add the remaining pepper powder and the salt needed too. Always be careful while adding the pepper powder. Be sure that you don’t make it very spicy. So use your required quantity. Cook for 5 minutes. Now add the remaining ½ cup thick coconut milk and cook for 3 minutes. If you want the gravy to be little watery add 1 or ½ cup water to the coconut milk. Today  as a  whole I used 1 cup milk adding 1 cup water.

Tuesday, May 3, 2011

Eral Kathirikkai Murungakkai Kuzhambu (Prawns with Brinjal and Drumstick)


Since cleaning prawns is a tough job, I always buy prawns from the lady who brings on her head home. I buy from her for the past 20 years. She as a practice cleans the prawns and takes out the kudal i.e., a long black thread like thing from its stomach. If that is not taken out it will lead to stomach pain. After she cleans and goes, I will make sure that she has taken it out from all the prawns. This Sunday as it is holiday time the town looks deserted as many have gone to their native place and she could not sell her prawns fully. She compelled me to buy more and was telling different recipes. I always make the prawn curry which my younger one loves. So I have never thought about an alternate recipe and that too kuzhambu. She said make vadai adding surakkai. I said I don’t use surakkai. Then she said radish and a handful of prawns will make yummy gravy. The smell of radish also will make my younger one run away from the dining table. So I thought I will make kuzhambu using one brinjal and one drumstick with little small onions and garlic. She said that also will be good and managed to sell ½ kg more of prawns.


The taste of the kuzhambu has no words to describe. My husband who always tries to make fun of my cooking somehow couldn’t resist telling that the dish is one of the best that I have cooked. My younger one who is very choosy also fell for its taste and said if I write a blog on this she will be the first to write the comment as she has tasted it. There was not a drop of gravy left over after dinner.


Those who live abroad may find it difficult to get fresh drumstick. They can try with radish or brinjal alone. A handful of prawns are enough. 100 to 200 Gms of cleaned prawns will be enough.

Ingredients

Prawns-100 Gms (cleaned) more can be added if desired

Brinjal-1

Drumstick-1

Small onion-20

Tomato-1

Garlic-20 pods

Curry leaves-little

Sambar powder-2 teaspoons

Coriander powder-2 teaspoons

Turmeric powder-1/2 teaspoon

Tamarind-gooseberry size

Procedure

In a kadai in 2 teaspoons of gingerly oil or cooking oil season the gravy with a teaspoon of mustard seed and little vendayam and curry leaf. Sauté the chopped onions nicely then the garlic and finally the tomatoes. When they are sautéed well add the sambar powder, coriander powder and turmeric powder and sauté well. Now add the brinjals and sauté in medium fire for 5 minutes. Meanwhile in 2 cups of water mix the tamarind and the salt needed .Once the brinjals are sautéed well add the tamarind salt water. Reduce the flame once the gravy starts boiling. Add the drum stick also. Cook for 10 minutes in low fire. Make sure that the brinjals doesn’t get overcooked. If so reduce the cooking time. Now add the prawns and cook for 5 more minutes. Prawns do not need much time to cook. Let the gravy stay for at least 2 hours before serving for best taste.

The gravy should not be very watery. It should be like puli kuzhambu.

Monday, September 28, 2009

Meal Maker Kuzhambu (Meal Maker Gravy)

Meal Maker is made out of Soya beans which is a source of high protein and fibrous food. Meal maker can very well substitute chicken or mutton during the months in which Hindu’s refrain from taking non-veg .It is used for preparing delicious foods resembling Non vegetarian diets. Soya bean has 50% vegetable protein and is a good fiber food enabling easy digestion and bowl movement. It is a soft fibrous vegetable matter resembling soft meat in texture. When soaked and boiled for a couple of minutes it assumes a good volume. In chettinad, meal maker kuzhambu is made out of the traditional chettinad masala and will taste like chicken kuzhambu.
Ingredients
Meal maker-100gms
Small onion-20
Garlic-15
Tomato-1
Ginger-small piece (crushed)
Coriander powder-1.5 table spoon
Chili powder-1 table spoon
Turmeric powder-1/2 teaspoon
Lime juice-2 teaspoons
For seasoning
Cardomom-2
Cinnamon-2 small pieces
Clove-2
Birinji leaf-small piece
Star anise-a small piece
Curry leaf- little
Fennel seed-1 teaspoon

To grind
Coconut grated-3 to 4 table spoons
Fennel seeds-1 teaspoon
Small jeera-1 teaspoon
Cashews-10 ( or pottukadalai 1 table spoon)
Method
Boil 4 cups of water and soak the meal maker balls in hot water for 10 minutes. Drain the water. Wash in cold water. Squeeze out the extra water and cut to 4 pieces. I always like to pressure cook the pieces as it will cook soft. If you also like it keep the small cooker or pressure pan in the stove. In one table spoon of oil season the gravy with the items given in “to season’. Sauté the chopped onion, garlic and tomato pieces for 3 minutes. In low fire add the coriander, chili and turmeric powder also and sauté for a minute. If the fire is high these powders will get burnt. So be careful. Add the meal maker pieces also and mix well .Add 3 cups of water and the salt required. Close the cooker and cook for 6 to 7 minutes in medium fire. Meantime grind the items given in' to grind' to a smooth paste. Open the cooker, after the pressure goes and add the grinded masala. The gravy will turn thick once the curry boils. If you find it too thick add a cup of water. Check for the salt and hotness. Usually it will be short of salt as the meal maker balls would have taken most of the salt. If anything is missing it can be corrected now. If it is too watery even after boiling for 7 minutes, add a teaspoon of coriander powder. Switch off the stove when you get the desired consistency and add the lemon juice


Thursday, September 24, 2009

Rasam (Sathya Aunty's Special Rasam)


This rasam recipe is the favorite of my younger daughter .This is not a chettinad recipe. We call this sathya aunty’s Rasam. One of my neighbors a kannada Brahmin called Sathya makes this mouth watering rasam and my daughter has grown with this rasam of hers. In her younger days sathya will feed her with this rice every afternoon which she loves .I take this oppurtunity to thank her for giving me this wonderful recipe which I love to share with my readers.I am used to making this rasam powder of hers and follow the recipe given by her which is little bit different from the rasam we make. But I bet that you don’t need sambar or any other gravy when you have this rasam. Once you get this rasam powder ready then it is an easy job. The biggest advantage of this rasam is that there will not be a bit of residue left in the rasam in the end. If you are cooking dhal for sambar or any other curry, you can use little bit of dhal for this rasam. It is not a must item

Ingredients
Tomatoes-2
Tamarind paste-1 teaspoon
Rasam powder-1 table spoon (As per the recipe I have given if possible or any other standard one)
Dhal water-1 cup (not a must)
Jaggery-1 teaspoon
Turmeric powder-1/2 teaspoon
Method
Put the tomatoes in boiling water and switch off the stove. Close the vessel. Open it after 5 to 10 minutes. Peel off the skin. Smash the tomatoes in a 1 1/2 cups of water. Add the tamarind paste and the salt needed and the rasam powder to this water. Keep the kadai in the stove. Add this mixture and let it boil for 5 minutes. Now add the dhal water if you have or else 2 cups of plain water and let the rasam boil for 5 minutes till the entire house is filled with the rasam smell. Add the jaggerry and switch of the stove in another 2 minutes. Finally season the rasam with a teaspoon of mustard,small jeera and curry leaf Fresh coriander leaves will change the taste of the rasam.So if desired try without adding coriander one day and otherwise another day.

Tuesday, October 7, 2008

Thatta Payaru Mavathal Kuzhambu (Cow peas mango gravy)


Sun dried veg and non veg are sure find items in a chettinad store room. The chettinad ladies stock these items when they are cheap in the market.Kathiri vathal,mavathal,Kothavarai vathal are some vegetables sun dried. They have by experience found out the best combination of these vathals with some pulses. Now days many are away from the chettinad homes and due to the scarcity of time and space these items have become a rare find in many chettiar homes.
Half ripe mookku mangai will be a best choice for making vathal.In my garden I have only a small mango variety and I stock little of that mango vathal during season.
The mangai vathal along with thatta payar will make an all purpose gravy when we are short of time or interest to cook. Fresh mangoes also will be good along with this payar.The gravy can be had with rice.Some papad will be a best side dish.For the curd rice the peas will be good.So if you make one gravy,then a good meal is on the cards

Ingredients
Thatta payar-1 cup
Mangai vathal-6 to 7 (soaked for 20 minutes in hot water) or fresh mango pieces-6
Small onion-10 or big onion chopped-1
Tomato-1
Sambar powder-2 teaspoon
Garlic smashed-6
Tamarind-1very little(1/4 teaspoon) (depend on the sourness of the mango used)
For seasoning
Mustard-1 teaspoon
Fennel seeds-1 teaspoon
Procedure
In a kadai dry roast the the thatta payar in slow fire for 3 minutes .Pour 3 cups of water and pressure cook for 5 minutes or cook in the kadai itself till the peas get cooked well. Once the peas get cooked add the mango pieces, onion, tomatoes and sambar powder. Cook for 5 more minutes. Now add the tamarind extract and the salt needed and cook for further 5 minutes. Make sure that the curry is little watery. The curry should be a little bit extra salty and hot, then only it will be good with rice and the peas will be tasty. When everything is cooked add the smashed garlic pieces before switching off the stove. Season the gravy with the items given in ‘to season’ in a separate kadai and pour into the gravy.

Monday, September 29, 2008

Pakkoda Kuzhambu Or Pakkoda Kuruma


Since long time this recipe is due from me as some of my readers insisted me to post this chettinad special curry. I took such a long time because I couldn’t find out the exact chettinad recipe and also after finding out, it took three or four times trial for me to make it perfect. Each time I made one one small mistake and finally has come out with the proper one.

Ingredients for the pakkoda
Channa dhal (kadalai paruppu) -1/4 cup or 5 to 6 table spoons
(Only small amount of pakkoda can be used for the gravy)
Red chilli-3 Fennel seed-1 teaspoon
Salt-very little
Soak the above items for 20 minutes and coarsely grind it in the mixie with little water.
Items to grind
Cocunut-2 table spoons
Kas kas-1 teaspoon
Cashews-5
Pottukadalai-1 table spoon
In the snap I have not shown coconut but coconut is needed to make the gravy thick and so I corrected in the next attempt

Ingredients for the gravy
Big onion (chopped)-1
Tomato (nicely chopped)-1
Garlic-5 pods
Coriander powder-1 table spoon
Sambar powder-1 table spoon
To season
Cinamon-3 pieces
Clove-2
Cardamom-2
Fennel seeds-1 teaspoon
Curry leaf-little
Procedure
Keep the grinded pakkoda mix ready. Keep little oil in the kadai for frying the pakkoda. Once the oil is moderately hot just drop the mix shapeless into the oil and fry. No need to make round ones. We call (ennayil uthuthu vidanum in Tamil).Fry all the mix and set aside.
Now we have to make the gravy to add the pakkoda. This gravy will always be spicy .So spices should be added while seasoning
Keep the kadai in the stove. In one table spoon of oil season the gravy with the items in ‘to season’. Sauté the onion, tomato and garlic pieces. Add the sambar powder and coriander powder. Sauté this too nicely. Now add 4 to 5 cups of water. Add little turmeric powder and the salt needed. Close the kadai and cook for 5 minutes. Now add the grinded coconut mix into the gravy and cook for 5 more minutes. Remember that the gravy should be watery while adding the pakkoda. Pakkodas will drink the gravy as times goes by and no gravy will be left at the end. So be sure the gravy is enough watery. Add the pakkodas in such a way that all the pieces are inside the gravy. Do not stir the gravy with a spoon after adding the pakkodas till they get soaked. After adding all the pakkodas allow the gravy to boil once and switch off the stove. Garnish with coriander leaves while serving

Friday, August 29, 2008

Saiva Meen Kuzhambu (Vegetarian Fish Curry)


For a long time I was trying to find out this recipe and personally see somebody cooking this chettinad special delicacy. Last week I was in chettinad and the lady cook( Akka) in our home was quite free to cook and show me this wonderful gravy. After cooking I served this vegetarian fish in my daughter’s plate and she could'nt find out till she swallowed one piece that it was not real fish. First she had the rice with the gravy and at that time she never found out. They steam the masala with which they make the fish in a leaf called lejjai ketta keerai (shameless leaf).It is a crotons type plant which is found in chettinad and I guess almost in all places in tamilnadu. They keep a small stick like pattai from plantain plant in the centre to get the centre hole in the fish. The veins in the leaf give the look of the thorns in the fish. I have clearly shown everything in the snap. They make the masal, steam it in the idly pot, cut into pieces, fry it, make the gravy exactly like fish curry and add the fried pieces.
Ingredients to make the masala for making fish
Thatta payar (cow peas)-1 cup
Chili powder-1 teaspoon
Garlic-5 pods
Fennel seeds-1 teaspoon
salt-1 teaspoon
Rotate the payaru one time in the mixie to break it and soak it for 1 hour. Coarsely grind the soaked peas along with the other ingredients. As we cannot get this leaf everywhere we have to find out some other means to steam it in the shape of the fish. I guess we can use plantain leaf and a small stick in the centre. Spread the mixture on to the leaf. Keep the stick in the centre and fold it. Carefully steam it. Once it is cold, remove the leaf, carefully pull out the stick and cut into pieces like fish. Fry the pieces in the oil and keep aside. Now we have to make the gravy exactly like karakuzhambu or fish curry
Ingredients for the gravy
Garlic-20 to 30 pods
Pearl onion (small onion)-20
Tomato-1
Curry leaves-little
Green chilli-3

Coriander powder-2 teaspoon
Sambar powder (kuzhambu milagai thool)-2 teaspoon
Turmeric powder-1/2 teaspoon
Tamarind-gooseberry size
Gingelly oil-1 table spoon

For seasoning
Mustard seed-1 teaspoon
Fennel seed-1 teaspoon
Fenugreek seed-1/2 teaspoon
Curry leaf-little


Procedure
Soak the tamarind with the salt needed in three cups of water. Add the coriander powder,sambar powder and turmeric powder to this water itself. Cut the onions and garlic into length wise pieces. If the garlic is not very big, no need to cut it. Cut the tomatoes also into small pieces. Keep the kadai in the stove. Season the gravy with the items given in ‘to season’ in one to 1 ½ table spoon of gingerly oil or cooking oil. Add the onions, garlic and tomatoes and sauté nicely. Now add the tamarind dissolved water .Wait for the gravy to boil nicely for 3 minutes. Now reduce the flame to minimum and allow the gravy to cook till it becomes thick. 5 minutes before switching off add the fried vegetarian fish and bring to a boil without stirring.

Thursday, June 12, 2008

Murungaikkai Thanneer Kuzhambu (Drum stick watery sambar)


As the name indicates this kuzhambu will be watery but with the full taste of a good sambar. In consistency it will be in the midst of sambar and rasam.This kuzhambu is very famous in chettinad. I used to wonder why it is so. In olden days chettiar men used to be overseas in pursuit of wealth. Only the ladies used to be at home and they used to spend the money given to them strictly in such a way that it lasts till the chettiar comes home the next time. This made them conscious of money matters.Because of this the chettiar ladies even if not educated became very good at accounts. They gave money for interest to the less privileged people in that village. They were able to calculate the interest exactly and were very just in everything. These things made them very calculative also. I know what is running in everybody’s mind now. Why is achi telling all these now? I also from my childhood used to think why the achi’s are very stringent while the chettiars are lavish and was trying to find out the reason. The reason was the ladies wanted to spend only a less portion of the money they had and save more for the number of children they had those days(especially for the girls,getting the girls married is a big affair in chettinad from those days). Coming back to the thanni kuzhambu, this became famous because only half the amount of Thoor dhal used for sambar is used for this kuzhambu and the achi’s specialized in bringing the exact taste with less dhal. So when the chettiar is away sambar will rarely find its way in the menu however rich the family may be. Moreover it will be very mild for the stomach. After a non veg day, this will be good for health. All chettiar people are addicted to this taste that even now in chettinad during all functions thanni kuzhambu will be served before sambar. Beans is the most commonly used vegetable for this kuzhambu. Now those days has gone and many don’t know the difference between a thanni kuzhambu and sambar.I also belong to this category. Once after tasting this kuzhambu wanted to find out the difference and tried. The main difference that I noted is
1. Less usage of thoor dhal.
2. Very little oil used
3. Seasoning first itself
4. Sauting the kuzhambu milagai thool and turmeric powder in the oil after seasoning

Ingredients
Thoordhal-a handful (100 Gms)
Beans-10 to 15 or 2 Drum sticks
Small onion-10
Garlic-6 pods
Coriander leaves-little
Curry leaves-little
Kuzhambu milagai thool-2 teaspoons
Tomato-1
Tamarind paste-1 teaspoons (qty used for sambar)
For seasoning
Mustard seed-1 teaspoon
Fennel seed-1/2 teaspoon
Fenugreek seed-1/2 teaspoon
Small jeera- 1 teaspoon

Procedure
Cook the dhal with extra water nicely in the cooker and keep aside. Keep the kadai in the stove. In 1 teaspoon oil season the kuzhambu with the items given in ‘to season’. Once the mustard seed cracks add the onion, garlic and tomato pieces nicely. Smash the tomatoes nicely with the ladle in such a way that there is little water content in the mixture. Now add the kuzhambu milagai thool and turmeric powder and saute nicely. If there is no water content before adding the powder it will get burnt. So be careful. Now add the vegetable used and sauté that also nicely. Add the water that is there on top of the cooked dhal and keep the stove to medium. Soak the tamarind and the salt needed also. When the vegetable is almost cooked add the tamarind water and the dhal mixed in a cup of water also. Make sure that the salt and hot taste is perfect. Let the kuzhambu boil for 5 to 7 minutes. Before switching off the stove add the chopped coriander also. Even for a 10 month baby this can be given mixed with rice or idly.
I rarely make this because I think that the only way I can give more protiens to my daughter is through the hot sambar rice with sambar made with a good quantity of dhal, I send to school through the carrier lady.But today immediately after entering the house from school she told me'Amma the sambar rice you sent today was awesome'.

Sunday, June 8, 2008

Poondu Vengaya kuzhambu Or Karakuzhambu Or Vathal Kuzhambu(Onion Garlic Gravy)


I know when we hear the name karakuzhambu itself it will be very tempting for many. All at my home are also no exception. In chettinad it is called as Vellaipoondu Vengaya kuzhambu. This for sure will be made at least once in 10 days in all homes. I for sure will make this once a week. It will go excellent with idly also. For packed lunch also it will be lovely. Though the recipe seems to be simple the taste of the gravy depends on the patience with which you cook. But by experience one will learn to make a good kuzhambu.
Ingredients
Garlic-20 to 30 pods
Pearl onion (small onion)-20
Tomato-1
Curry leaves-little
Coriander powder-2 teaspoon
Sambar powder (kuzhambu milagai thool)-2 teaspoon
Turmeric powder-1/2 teaspoon
Tamarind-gooseberry size
Gingelly oil-1 table spoon
For seasoning
Mustard seed-1 teaspoon
Fennel seed-1 teaspoon
Fenugreek seed-1/2 teaspoon
Curry leaf-little
Procedure
Soak the tamarind with the salt needed in three cups of water. Add the coriander powder,sambar powder and turmeric powder to this water itself. Cut the onions and garlic into length wise pieces. If the garlic is not very big, no need to cut it. Cut the tomatoes also into small pieces. Many don’t use tomatoes for this kuzhambu. To reduce the use of tamarind, I use tomatoes. Keep the kadai in the stove. Season the gravy with the items given in ‘to season’ in one to 1 ½ table spoon of gingerly oil or cooking oil. Add the onions, garlic and tomatoes and sauté nicely. Now add the tamarind dissolved water .Wait for the gravy to boil nicely for 3 minutes. Now reduce the flame to minimum and allow the gravy to cook till it becomes thick. I usually wait till the oil separates. For the new ones they can switch off the stove when it becomes 1/3 rd in quantity. In between you can check for the taste and add chili powder or salt if needed. (While sautéing if you add some vathal like sundakkai or manathakkali this kuzhambu can be called vathal kuzhambu)

Wednesday, June 4, 2008

Tomato Rasam (The simplest Recipe)


I know this is the most common item for lunch in almost all south Indian homes and even a new one to the kitchen would have tried it. Whatever menu I would have cooked and however tasty it will be, they will take only a second position in the favorite food list in our home. The most preferred by all always will be Rasam and potato fry. So I boldly try out different recipes of Rasam. But first I will give the simplest version of rasam which will take just 5 minutes to prepare but at the same time satisfy everybody at home right from the small kid to the most elderly person at home.(The experienced people in the kitchen please bear with me for posting this simplest recipe. I am posting this recipe because many who are new to cooking are confused about the quantities to be used)

Ingredients
Tomatoes-2 medium sized
Tamarind paste-1 teaspoon
Red chillies-2
Curry leaf-little
Coriander leaf-little
Water -4 to 5 cups

To crush in mixie
Pepper corns-1 teaspoon
Garlic-4 to 5 pods(without peeling the skin)
Small jeera-1 teaspoon
Procedure
If your tomato is hard, it will be difficult to crush. In that case cut the tomatoes into pieces. Crush the tomatoes in 4 to 5 cups of water along with tamarind and salt required. Many use stored pepper jeera powder for rasam.But I feel if you can crush them fresh every time it will do much good to the flavor. Remember that you have to just crush them all together and not powder them. As you are adding garlic along with pepper and jeera it will not get powdered also.
Keep the kadai in the stove. In one teaspoon of oil season the rasam with a teaspoon of mustard seed,2 red chilies broken, a teaspoon of small jeera and little curry leaf. Once the mustard seed splitters, pour the dissolved rasam into the kadai. When the rasam is about to boil add the crushed mix into the rasam and bring it to a boil. For this kind of rasam too much boiling is not needed. After switching off the stove add some chopped coriander leaves. Transfer the rasam to a serving bowl immediately and close it. If you keep the rasam in the kadai open for a long time without closing the rasam will loose the flavor.
This rasam will be excellent with potato fry

Saturday, April 26, 2008

Milagu Kuzhambu (Pepper Corn gravy or Black pepper curry)


Chettinad cuisine is incomplete without black pepper. In olden days food was medicine and medicine was food. Those days people knew remedy for the different ailments from the items in the kitchen itself. Medicine was not much developed and the number of diseases compared to today was also less as the ill effects of pollution, pesticides and chemicals were not there. It is said that pepper was like a doctor in many homes. It is called as the king of spices or Gem of spices. There is a saying that “If you have 10 peppers you can have food even in your enemy’s house”. It implies that this spice act against food poisoning. The medicinal properties of black pepper are immense. The kashayam made out of pepper is very good for Respiratory tract infections, ordinary cold and cough. A pinch of nicely ground pepper along with honey is very good for cold. When somebody at home is suffering from cold the main menu for lunch will be pepper rasam only in all south Indian homes. It improves appetite by helping in digestion. It produces an increased flow of saliva and gastric juices. This is very good for intestinal disorders. In Ayurvedic medicine it is said to improve the quality of semen in men. I can understand what is going on in everybody’s mind now as how to take this spice in little large quantity as it will be very hot and spicy. In Chettinad cuisine there is wonderful gravy out of pepper corns called Milagu kuzhambu.I wanted to make this curry in the perfect chettinad style and was waiting for the holidays during which I visit chettinad to try this with the help of my mom. Last week fully I was there to attend some marriages. I attended a grand chettiar marriage and to my surprise the first dish served there was milagu kuzhambu.It was very unusual as they serve only paruppu and ghee first. But it was a good idea.The kuzhambu acted as an appetizer.I couldnt take proper snaps as I didnt take my camera.Somehow I managed to take some though not very clear
Ingredients
Small onion-30
Garlic-20 pods
Tamarind-small piece


To roast and grind
Black pepper-1 table spoon
Coriander seeds-2 table spoons
Grated coconut-3 table spoons
Fennel seeds-1 teaspoon
Small jeera-1 teaspoon
Garlic-5 pods
Green chillies-2
Red chillies-3
Small onion-5
Cashewnut-2
Cinnamon-1 small piece

In a kadai with 1 teaspoon coconut oil dry roast all the above items and grind to a smooth paste
Cut 20 small onions and 10 garlic pods into small pieces.
Keep the kadai in the stove. In two tablespoons of gingili oil season the gravy with little small jeera, curry leaves and fennel seeds. Sauté the onion and garlic pieces. In two cups of water dissolve a small piece of tamarind, and the salt required and add to the onion garlic pieces and allow the mixture to boil for 5 minutes. Mix the grinded mixture in ½ cup of water and pour into the kadai. Keep the stove in medium flame and allow the mixture to boil till it becomes semi solid. This gravy will taste excellent with idly. If the gravy is found too hot it can be given to small children with plenty of gingili oil or little ghee.

Tuesday, February 19, 2008

Mandi (Vendakkai Mochai Mandi)


This is a Chettinad special curry or side dish (as it can be used as both) which for sure will find its place in all special lunch served in chettinad. As it won’t get spoiled fast it is taken as side dish for picnics. My brother is a big fan of this curry but I have not bothered even to taste that till I myself prepared it. As ladies finger and potato will be seen as pieces along with long green chilies without any color to the gravy, I thought the taste also will also not be great.
For a long time this recipe is due from my side as some of my readers are eager to know about this dish, and I was little hesitant to write about this as I have never prepared this. For my readers sake I got the recipe from my mother and thought I will try 2 or 3 times and when it comes good I will blog the recipe. To my surprise it was awesome in my first trial itself. As I didn’t take the snaps first time, I had to make it again to write about it. This time also I made it very good. My daughter just loved it and started asking me why I never prepared this. Thanks to my readers as I found out another dish which my child loves. Each vegetable in the mandi got all the 3 tastes (salt, sour, hot) and tasted excellent with curd rice and the little gravy in the dish was also excellent.
The main difference in this curry to the other curries we make is that, we use green chilies instead of chili powder for the hot taste. Instead of water we use ‘Arisi Mandi’( the water we get while washing rice) for making the gravy. I guess it is this water which gives so much taste to the gravy. If we prepare this dish on days in which we soak rice for idly we can get thick mandi. (I used just the water taken from 1 ½ cups of rice).
For taking the water, just wash rice once, pour of the water and soak the rice in two cups of water for 5 minutes then drain the water and keep aside.
Mandi it is said can be made using all vegetables but I guess this combination will be the best since I have seen only these vegetables usually .If mochai is not there also no problem.I didnt soak the mochai the previous day,so made the curry without that.There was not much difference in taste


Ingredients
Ladies finger-6
Small onion-20
Garlic-15 pods
Tomato-1
Green chillies-4 to 5
Potato-1
Arisi Mandi-2 cups
Mochai(white one)-a hand full(It should be soaked overnight)
Tamarind-a small piece (as shown in the snap)
If you have Manga vathal soak 5 vathals in hot water and add while adding mochai to the curry. In that case reduce the amount of tamarind used.

Method
Pressure cook mochai for 1 whistle and keep aside. Keep the kadai in the stove. In 2 teaspoon oil season with little mustard, curry leaf and fennel seeds. Add the chilies, chopped onion and garlic pieces and sauté for 2 minutes. Now add the ladies finger and sauté nicely for another 3 minutes. After this add the tomato, mochai and potato pieces, put little turmeric powder and pour 1 ½ cups of Arisi mandi and cook in medium flame. When the potato pieces are cooked add the salt and tamarind soaked in ½ cup of Arisi mandi. Let the mixture boil for 3 minutes after tamarind is added. The curry should be semi solid (neither too watery nor too thick).If you are going to keep it for a day without refrigeration then don’t use tomatoes